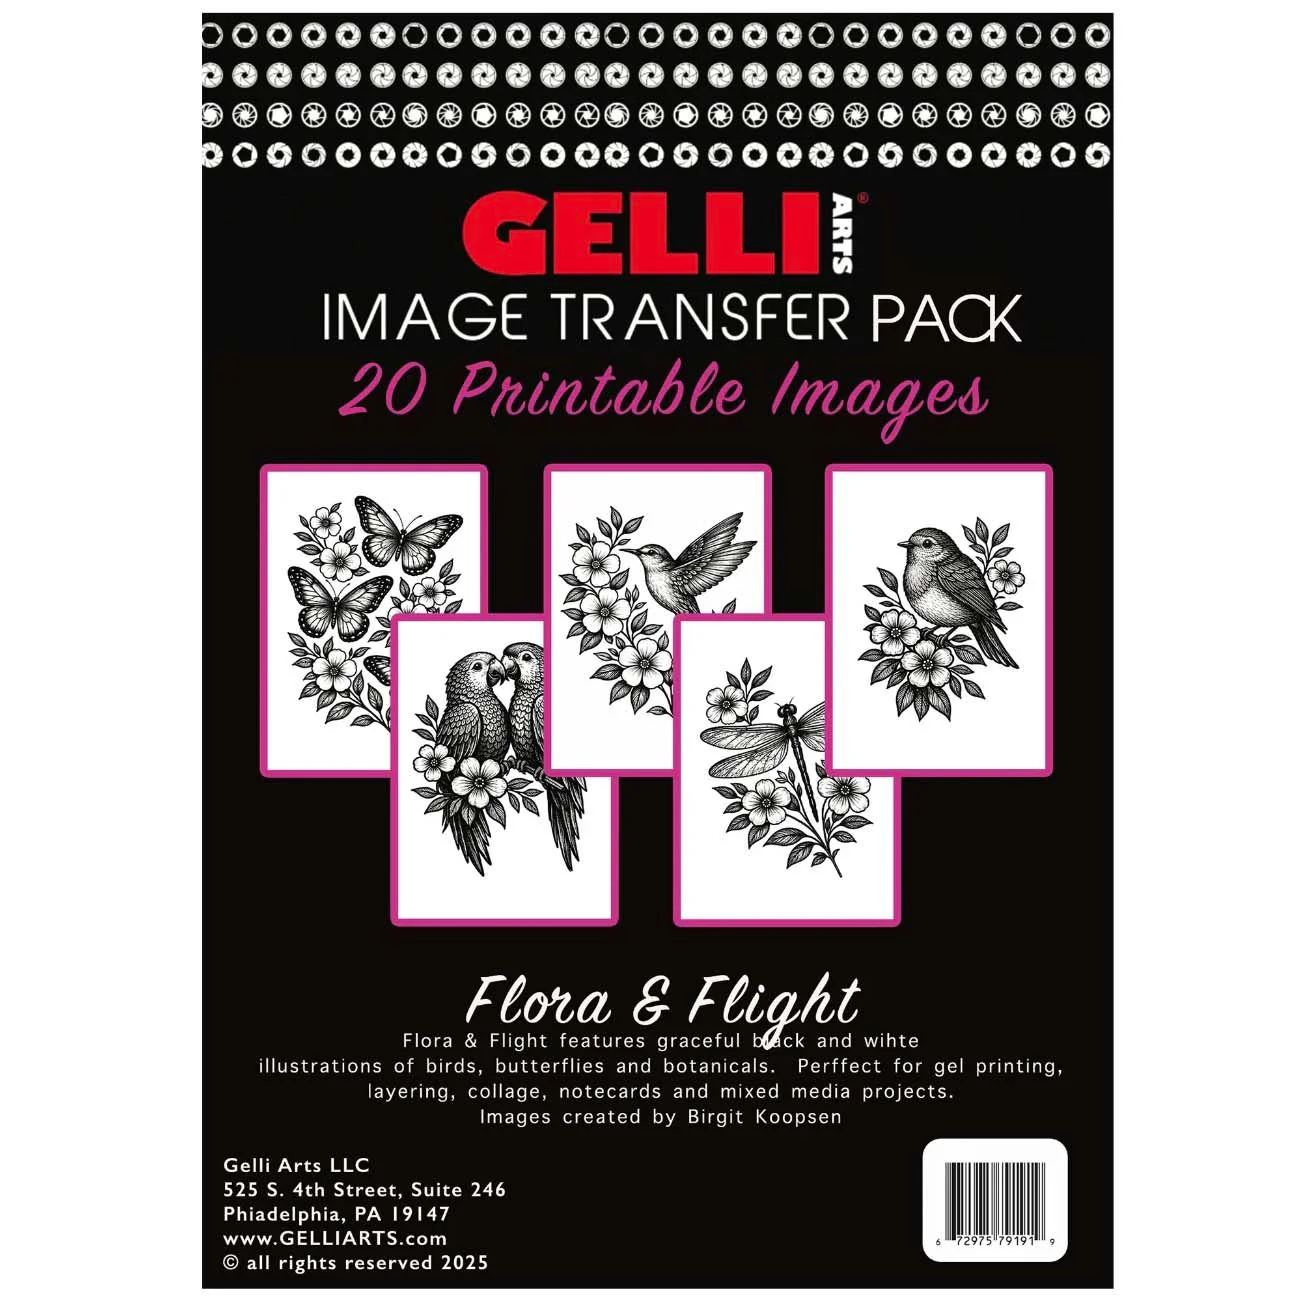
Gelli Arts Image Transfer Printables Pack Flora and Flight
Create your own image transfers with the Gelli Arts Image Transfer Printables Pack: Flora and Flight. This pack includes 20 laser-printed images featuring 5 nature-inspired designs with birds, flowers, butterflies, and a dragonfly. Each design is printed four times on 5 x 7 inch sheets, giving you multiple chances to experiment with beautiful layered transfers in your artwork. Perfect for use with the Gelli Arts Image Transfer Kit, these ready-to-use prints make adding detailed imagery to mixed media projects simple and fun.
Printing Instructions:
• Apply a pea-sized amount of black acrylic paint to your Gelli Arts plate.
• Roll out the paint into a thin, even layer that completely covers the plate (it should be opaque).
• Place the printable image face down onto the plate, smoothing gently to avoid air bubbles.
• Lightly press with your fingers—avoid pressing too hard.
• Peel back a corner to check the transfer, then carefully remove the image.
• Allow the transferred image to dry completely on the plate.
• Roll out a thin layer of contrasting acrylic paint over the dried image (you should still see the image faintly).
• Place a clean sheet of paper on top of the wet paint and press firmly.
• Let dry for about 10 minutes.
• Peel back the paper to reveal your transferred tile print.
Description
Create your own image transfers with the Gelli Arts Image Transfer Printables Pack: Flora and Flight. This pack includes 20 laser-printed images featuring 5 nature-inspired designs with birds, flowers, butterflies, and a dragonfly. Each design is printed four times on 5 x 7 inch sheets, giving you multiple chances to experiment with beautiful layered transfers in your artwork. Perfect for use with the Gelli Arts Image Transfer Kit, these ready-to-use prints make adding detailed imagery to mixed media projects simple and fun.
Printing Instructions:
• Apply a pea-sized amount of black acrylic paint to your Gelli Arts plate.
• Roll out the paint into a thin, even layer that completely covers the plate (it should be opaque).
• Place the printable image face down onto the plate, smoothing gently to avoid air bubbles.
• Lightly press with your fingers—avoid pressing too hard.
• Peel back a corner to check the transfer, then carefully remove the image.
• Allow the transferred image to dry completely on the plate.
• Roll out a thin layer of contrasting acrylic paint over the dried image (you should still see the image faintly).
• Place a clean sheet of paper on top of the wet paint and press firmly.
• Let dry for about 10 minutes.
• Peel back the paper to reveal your transferred tile print.